My Niece’s Prom Makeover – Pretty and Glowing Makeup!

Hi everyone! Welcome back to my blog – I’m really excited for you all to read this post as it features my first makeover on someone other than myself haha! A couple of months ago my niece Bethany asked if I would do her makeup for her school prom, and the first thing I thought was along the lines of…. “You’re that age already?!?!”. I remember my school prom like it was just yesterday, so it feels crazy to me that Beth was planning her first ever prom.

11019216_1741977872696288_8028900641950645376_n

Beth came over to my place the day before her prom, so she could look through my makeup collection and we could both choose which products to use to get the look she wanted. I wanted to trial a primer and foundation on her also, to make sure it worked for her skin so that her photos would come out perfect! If you want to know how I achieved Beth’s Prom Makeover look then keep reading!

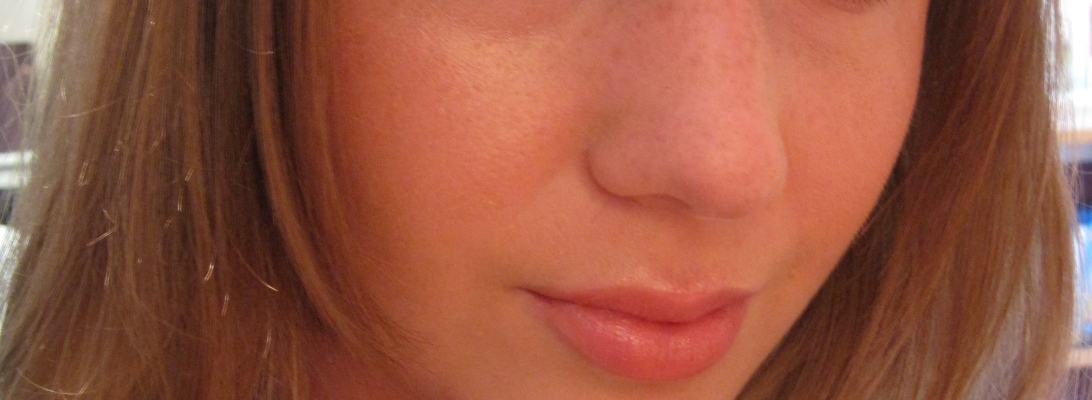
Primer – I used two different primers for Beth’s skin – I started with Smashbox Photo Finish Primer on her T Zone and then went for Smashbox Photo Finish Hydrating Primer on her cheeks. I chose these to combat any oil in her T Zone but to make sure her cheeks were glowing through the foundation.

Foundation – We went for Lancome Teint Miracle Bare Skin Foundation. Beth didn’t need a high coverage foundation as she doesn’t really suffer from any redness, just the occasional blemish. This worked perfectly on her skin and looked very natural.

Concealer – For under the eyes I used Maybelline Dream Lumi Touch as this is a brightening concealer, and for the occasional blemish cover up I used Mac’s Pro Longwear Concealer.

Powder – I used my trusty Rimmel Stay Matte powder on Beth’s T Zone, applying minimal powder on the cheeks as we want the cheeks to glow.

Blush – Beth absolutely loved the Benefit Sugarbomb blush as it had a beautiful sheen to it, so I applied a little pop of this onto her cheeks.

Highlighter – I chose The Balm’s Mary-Lou Manizer Highlighter and applied this to the tops of her cheekbones. This product looked absolutely stunning on her.

Bronzer – As an overall bronzer I applied the Lord and Berry Bronzer in Sienna. I then took Benefit Hula and contoured Beth’s cheeks slightly. I wanted this to be as subtle and natural as possible.

Eyebrows – I used Beth’s regular eyebrow product, Benefit Browzings in Medium. Beth has gorgeous brows anyway, so I didn’t have to do much to them!

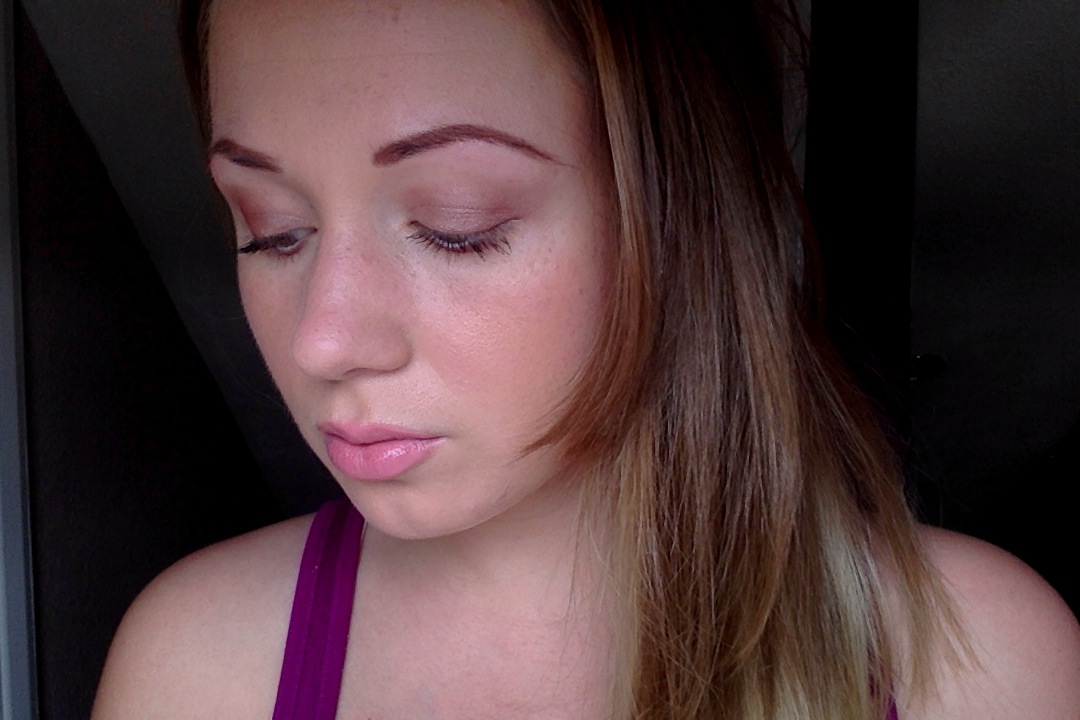
Eyes – I delved into my Mac Palette for Beth’s look as I wanted to use the best quality eyeshadows I had. I started with Petina which I applied all over the lid, in the crease and underneath the eye. I then applied All That Glitters in the middle portion of the lid to create a really reflective effect which looked stunning. I then applied Woodwinked into the Outer V area to create a bit of depth. Beth didn’t apply a mascara until just before the event, so no mascara was worn in these pictures.

Lips – I left Beth to choose which lipstick she loved out of my Mac lipsticks, and she went for one of my all time favourites, Hot Gossip. This is a beautiful shimmery Rose Pink.

Here is the finished look!

IMG_1023IMG_1026

IMG_1022IMG_1024

What do you think of Beth’s prom makeup? Thank you so much for reading my blog. I would love it if you could pop along to my Youtube Channel ‘Little Miss Makeup’. I have recently uploaded some new videos on there!

Lots of Love

Little Miss Makeup x

Sun kissed bronzed Summer Inspired Makeup Tutorial!

Hello everyone! Hope you have all had a good weekend and start to the week. As Summer is pretty much here now (not the greatest weather yet, however) I thought it would be a good idea to do a sun kissed bronzed inspired makeup tutorial! With this look I wanted to go for bronzed skin, golden shimmery eyes and a pretty coral lip. I hope you all like it!

IMG_0628

For my base, I started with the Bourjois Happy Light Luminous Serum Primer. I definitely recommend this primer as its extremely light and makes your foundation glide on beautifully. I used the matching Bourjois Happy Light foundation, in the shade Rose Vanilla. This is ideal for summer, as it’s a light coverage, you can barely feel it on your skin and it gives a lovely dewey effect. Perfect for this look! For concealer, I used two different ones. I used the Collection Lasting Perfection Concealer in Fair, to cover my blemish, and then the Rimmel Wake Me Up Concealer in Ivory, to cover my under eye circles. Both were applied using the Real Techniques Miracle Complexion Sponge.

IMG_0626

In order to give my skin a real glow, I used the Bourjois Chocolate Bronzer to contour my cheeks and the sides of my nose, as well as the edges of my face. For even more glow, I used the Benefit Coralista blusher, and applied this with the Real Techniques blusher brush, to the apples of my cheeks. To finish my face makeup, I used Benefit’s Watts Up highlighter. I applied this just using my fingers, and put it on the tops of my cheekbones, the brow bone and cupids bow.

IMG_0624

For the eyes, I wanted to use the Naked 3 Palette! I haven’t used this palette for a tutorial yet, so thought it was time to bring it out! I started with patting the lids with the shade Strange, as a base, and then applying Trick over the top of this, to create a glowing peachy colour on the lids. I also took trick under the eyes, with a thin angled brush. Next, I used the shade Liar and blended it through the crease. I took it slightly higher then I usually would, blending it well using the Ecotools Airbrush Concealer Brush. This is how it looks so far.

IMG_0578

I then wanted to darken the eye colour slightly, so took the shade Mugshot, and applied this to the outer v, blending it slightly into the crease. To highlight the inner corners, I used a colour from my Mac Pro Palette called Nylon, as this is a beautiful shimmery highlighter. To line my waterline, I used the Benefit Bad Gal Liner in brown, as I didn’t want my eyes to be too dark. At this point I went onto my eyebrows, just filling them in with the Benefit Browzings in the shade medium. To finish the eyes, I curled my lashes and applied the Maybelline ‘The Falsies’ on my upper lashes. Lastly, I used the Nivea Pure & Natural Milk & Honey lip balm and coated my lips with the Maybelline ColorSensational lipstick in the shade 852 Coral Pearl. This lip colour is absolutely gorgeous, and I highly recommend it for Summer! It’s very sheer but still extremely pigmented! So, here is the finished look!

IMG_0612IMG_0610

IMG_0603IMG_0618

I’m really happy with this makeup look! I hope you all like it, and if you try to recreate it please comment below with a picture 🙂

Thanks for reading!


Little Miss Makeup x


Spring/Summer Inspired Makeup Tutorial

Hi everyone!

Today’s blog is going to be something a little different, as I have decided to do a Spring/Summer inspired makeup tutorial. I wanted the look to be flawless, but simple and pretty, for everyday wear. This makeup look didn’t take me too long to do either, which is great if you are in a bit of a rush but still want to look like you have made an effort!

IMG_0498

So, for starters I did my normal skincare routine (Scrub, cleaner, toner) and put some of the Garnier Moisture Match Revitalising Hydrating Gel on my face. This moisturiser is fantastic, as its non greasy and is extremely light. I waited for this to dry before applying a bit of the L’Oreal Lumi Magique Pure Light Primer. As I still have some of my spot scars on my chin, I wanted to apply a bit of my Clinique Moisture Surge CC Cream (Light) in that area to cover them up, as the foundation I’m going to be using has a light coverage. I then applied the Lancome Teint Miracle Bare Skin Perfection Foundation in the shade 02, with a Real Techniques Buffing Brush. This foundation is great as it’s so light on the skin, and doesn’t look like you are caked in makeup at all. After this, I applied the Rimmel Wake Me Up foundation under my eyes to brighten up my face, and to completely conceal my spot scars. I just blended this in with my fingers. To finish off my face makeup, I applied the Benefit Sugarbomb Blush (This product is just beautiful!) with a Real Techniques Blusher brush and the Rimmel Stay Matte powder with a regular powder brush.

IMG_0497

Now, onto the eye makeup! I have just recently purchased Benefit’s Big Beautiful Eyes Eye Contour Kit, and really wanted to give this a go! I am SO glad that I did.

IMG_0502

IMG_0499

This palette comes with their under eye concealer, a base colour, contour colour and an eyeliner colour. It comes with a booklet of how to apply this makeup too which is fantastic! I started with applying the base shadow all over the lid, and into the crease, using their contour brush. I then used their liner brush to line underneath my eye with the contour colour. I didn’t want this too dark as it was a light daytime look, so i left out the darkest liner colour on the far right of the palette. I then took my Ecotools Airbrush Concealer brush to blend the contour shadow through the crease to make a nice soft look. I then applied my Rimmel Soft Kohl white eyeliner through my water line to brighten up my eyes. I chose the Lancome Hyponose Mascara Volume for todays look, as it lengthens my lashes perfectly but doesn’t make them too thick (despite the volume in the name!). For my eyebrows, I used Benefit’s Browzings kit in the colour medium. Now, for the lips! My favourite part! I went for a pale pinky nude on the lips as I wanted a natural, pretty colour. Mac Creme Cup was perfect for this! Here is the finished look!

Photo on 21-05-2014 at 12.12 #2

Photo on 21-05-2014 at 12.12

Photo on 21-05-2014 at 12.14 #2

Photo on 21-05-2014 at 12.15 #3

I wanted to show this look in artificial and natural light, as I think it looks great in both! I’m very happy with this Spring/Summer inspired look, and think this will be my ‘go-to’ daytime look in the future!

I hope you enjoyed this tutorial! Please comment below with pictures if you have recreated it as I’d love to see how it looks on you too!

Thanks for reading!


Little Miss Makeup x